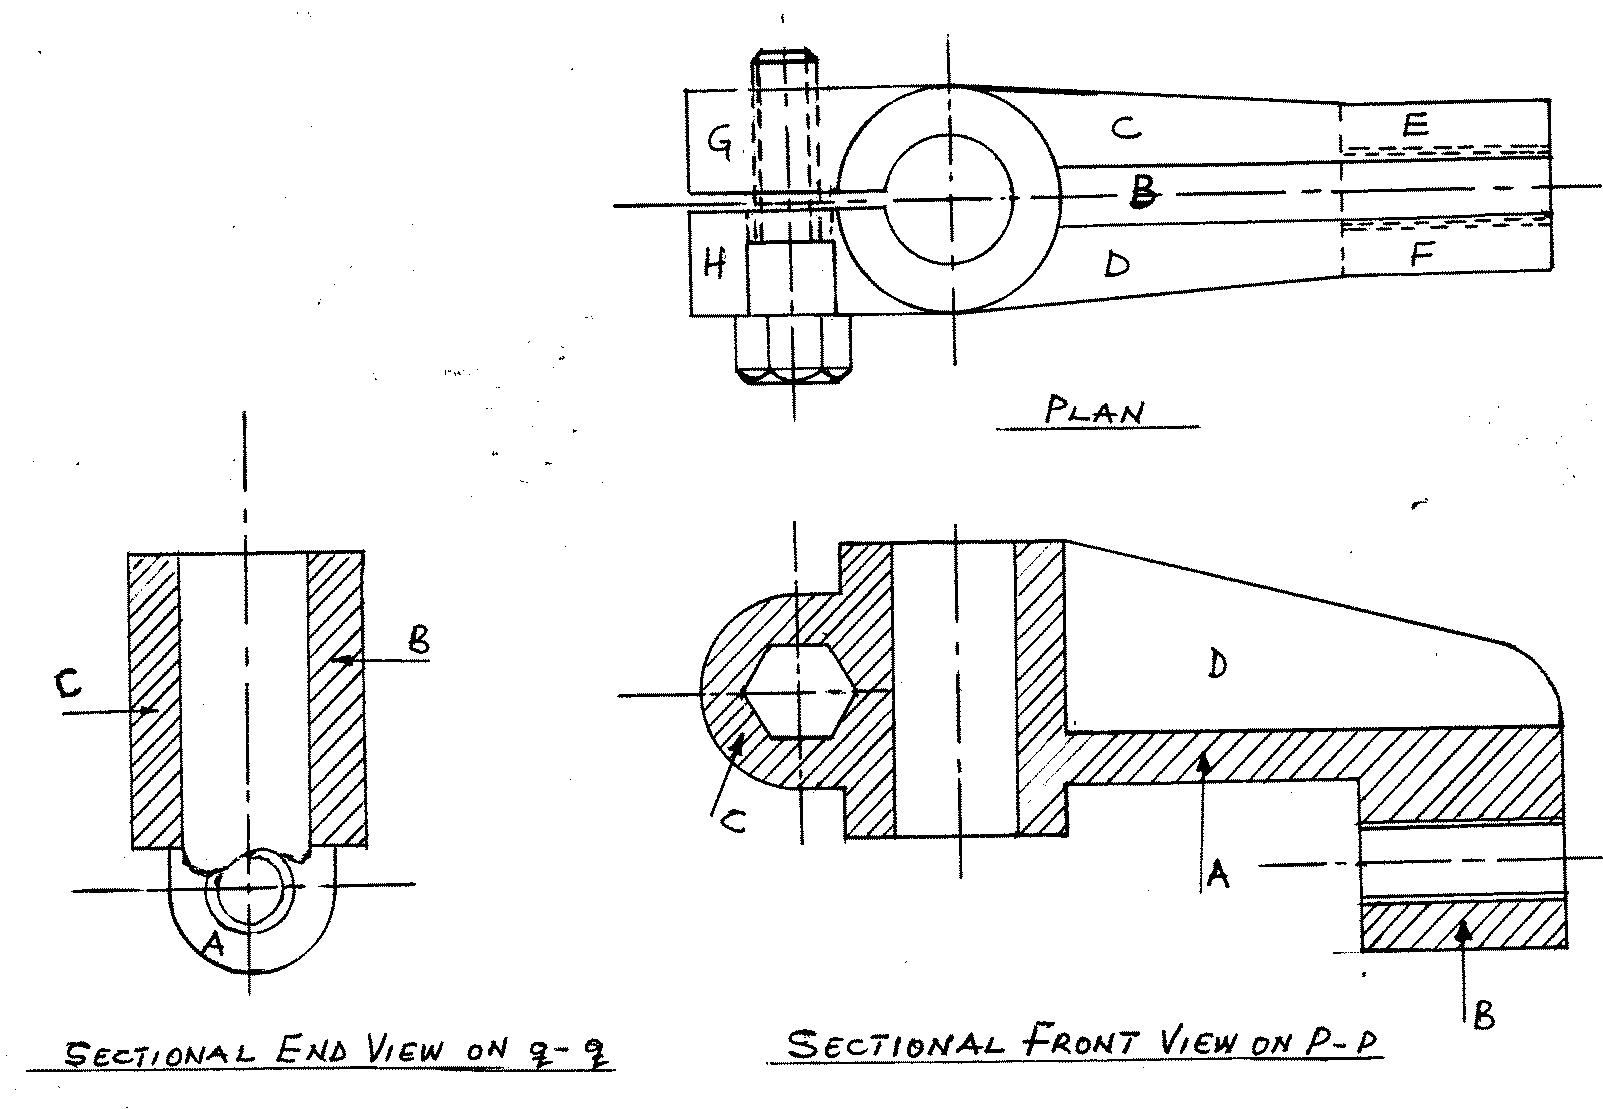
- The given plan
Candidates were expected to draw in third angle projection. They were to show 3 centre lines,
the outline, bolt in position, boss(large circle), vertical hole( small circle), the web. Faces C,D,E,
F,G and H, hexagonal head and end bolt . the scale required is half full size.
- The Front View On P-P
Candidates were expected to draw in third angle projection. They were expected to show
centre lines(4no), outline, bolt head (hexagonal), boss, vertical hole, the web, faces A, B,
C and D, threaded hole. The scale is half full size, and necessary sectioning must be shown.
- Sectional End Elevation
Candidates were expected to draw in third angle . They were expected to draw centre
lines( 2no), outline, two circles to show the threaded hole, faces A, B and C, vertical hole.
The scale is half full size and necessary sectioning must be shown.
Most of the candidates did not attempt the mechanical option. Most of the few who did,
however, performed above average. The solution is given below


